Initial ideas
My initial ideas for this brief were very broad. As I discovered when I asked around a few people who I thought to be the targeted audience for this brief, I found that if people were going to share a pack, then they would want to be able to have as much choice as possible without it inflicting on what the other person chooses to have.


So my main aim for the boxes themselves would be that the shapes of the 2 main boxes I would create could host a large range of different products and that the space they would be accommodated in could fit everything in - whatever combination!
Inner holding system for Main holding carrier
One of the first things I started working on alongside deciding on my main 2 nets was how everything was going to fit in the box.

This plan was like the top of a McDonald's straw holder - it has push-through sections that would grip onto the products and hold them in place. I found this difficult to work with as it made the outer box bigger and bigger and the bridges and walls in the different sections would be weaker if made smaller. So this idea was scrapped and a new system was adopted.

this system featured the criss-cross of lots of different panels making up the grid. This also meant that when empty it could twist and go flatpack - a feature that I wanted to play with and see if I could make the whole design flatpack and therefore reduced environmental impact because of it's transportability and reusability.

This quick demonstration taught me that carton board (the requested material to use) is extremely sturdy and can withstand lots of wearing before it tears.

Here I am working out all of the correct measurements so it can be digitised ready for possible laser-cutting.
Dessert box net
My dessert box was heavily inspired by this wrap box from Tesco:


I really liked the opening mechanism and use of the window.

So here I am re-working all of the dimensions into the correct format ( I measured a slice of cake! )

And drawing them out by hand accordingly.

After a mock- up assembly, I started to sketch out the possible artwork for the product. I already had the logo, colours and pattern figured out, it was a case of handling all of the required information and playing around with the layout.
Step by step digital development of dessert net:

Following the format of the pattern I created, I created a series of frames to contain all of the information.


I used all the things necessary for authenticity: nutrition levels, barcode, ingredients, Waitrose logo, sell by date, disposing and recycling instructions and item description.


I decided to show how the products would be distributed in-store by designing my own shelf banners!


Main meal / sandwich net

Main holder carrier net development

Here are lots (and lots) of ideas for how the main carrier box could support itself whilst remaining in the same material as the others, but being able to support it's weight. I had the idea that the handles would come up through the entire box and be secured by a bellyband. This would have probably been the most secure way but it interfered too much with my existing inner slot system, and so I pursued a normal box with a bellyband wrapped around:

Some ideas for the main carrier graphics:

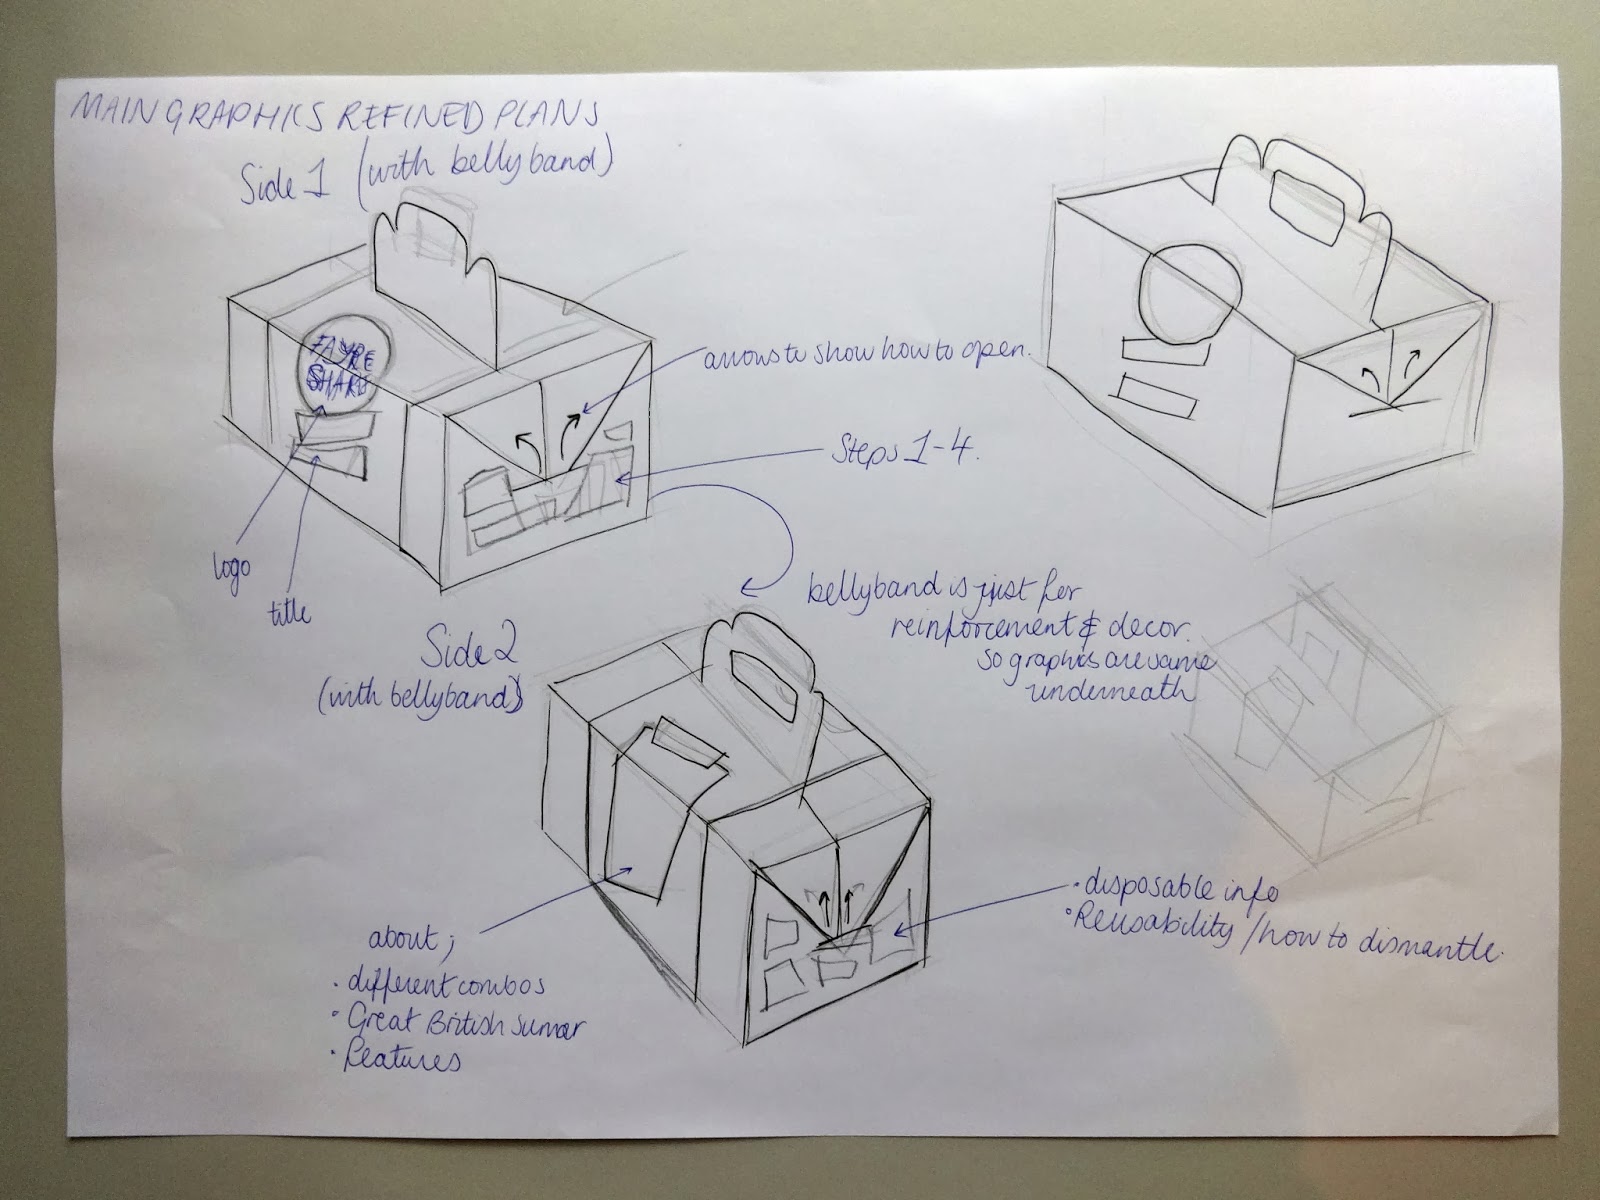

I wanted the logo to be large across the sides and over the lid, with the pattern also featured on it somewhere. I would learn to develop it a lot more digitally.
Bellyband attachment idea:

I wanted to be able to use minimal glue wherever possible, and I wanted the bellyband to be reusable with the box and so created a simple hook and eye attachment so that it could be reused.
No comments:
Post a Comment